Saturday, January 23, 2016

How to Make an SVG Cutfile for a Machine Embroidery Applique using Buzz Edit and Cricut Design Space PART TWO

First things first, when you close Buzz Edit DO NOT SAVE THE CHANGES. You will delete all of the file except the placement stitch!

Open Cricut Design Space. Choose File. New.


Choose Upload Image.


Choose the embroidery file you saved.


I choose to upload it as a moderately complex image, even though I don't really think it's complex at all.


Click on the picture,outside the outline. This will erase everything outside of the bone except the box.
It will look like this: NOTE I HAVE EDITED THE DIRECTIONS IN PART ONE. PLEASE GO BACK AND REVIEW HOW TO ELIMINATE THE BLACK BOX ALTOGETHER.


Click along the outside box. It won't disappear on this view but it will at the end view. If it doesn't keep going back until it does. 


Click Continue.


Click Save as Cut Image and Save.


Choose your image and click insert image.


Click on the image so that there is a box around it. Choose edit and click on the lock. Enter the measurements you wrote down earlier.
If you don't click the lock so that it looks like an unlocked padlock you will not be able to put in the exact measurements. The lock keeps the measurements in proportion. If you would like to inflate the size of the cut you could add .06 inches to each axis.  Also choose layers and make sure to choose the scissors icon, so that the image will be cut.


Save your work.
Click Go.


Make sure to Mirror the design!!!!!!!!!!!!!!!!!


I use heat and bond lite on the fabric and place the fabric paper backing side up on a heavy grip mat.
Check again that you have mirrored the design. 

Load your mat and press go. 

Now you can go to the Embroidery Machine and begin your applique.


How to Make an SVG Cutfile for a Machine Embroidery Applique using Buzz Edit and Cricut Design Space PART ONE

Open Buzz Edit.
Chose an applique file.
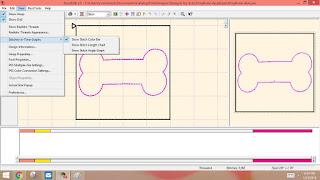
Under view make sure you have chosen Stitches in Time Graphs.
Check show stitch color graph.


Left click hold and drag in the upper color bar, highlighting all but the first placement stitch color.
It will look like this:


Choose Edit, then cut.


This leaves only the outline stitch.


Choose View, Actual Size Pop Up
MAKE SURE TO WRITE DOWN THE SIZE THAT IS CIRCLED ON THE BOTTOM RIGHT 


Use the microsoft snip tool (sorry, I've circled the paint icon and not the snip tool,the snip tool is to the left and looks like scissors.) and save the actual size pop up as a .png file. Save it to your desktop so you can find it. I save mine in a folder called snip files.


EDITED When using snip tool open the options tab, it looks like a gear, under ink color, uncheck the box that says " show selection ink after snips are captured." This will eliminate the black box around the snip, keeping you from  having to remove that in design space.


Make sure you have written down that size, you will need it in Design Space !!!!!!


Followers